Integration Steps
There are three simple steps for integrating Zyler Go on Webflow when using CMS collections:
Step 1: Including the Script
Copy and paste the script into the "Head code" for your website:
- Navigate to "Settings" -> "Custom code".
- Scroll to "Head code".
- Copy and paste the script below into the textbox, replacing
<partner-id>with your value from the Partner Portal.
<script defer partner-id="<partner-id>" src="https://www.zyler.com/js/go-integration/v1/index.js"></script>
The script uses the defer attribute which is recommended for use if including scripts in the <head>. This ensures the script does not run until the browser has finished loading the page content.
The script above uses the Go integration. It's not necessary to understand how this works, but for additional context, see Zyler Go and Direct Integration.
Step 2: Styling Using CSS
To style your Try On buttons, copy and paste the following CSS into the same section as the script, either above or below it. You can edit it to match the brand of your website as you see fit, the content, position and style of the buttons are in your control.
<style>
  .zyler-try-on-cta {
    display: block;
    border: 1px black solid;
    border-radius: 2rem;
    padding: 0.5rem 1rem;
    background-color: white;
    cursor: pointer;

    &:hover {
      background-color: #f0eff0;
    }
  }
</style>
Step 3: Configuring your Site
Edit your PLP and PDP to add Try On buttons with the following:
-
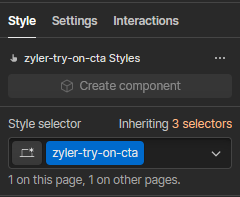
Create a Webflow "Style selector" called
zyler-try-on-cta. This is used by the script to locate the Try On button:
-
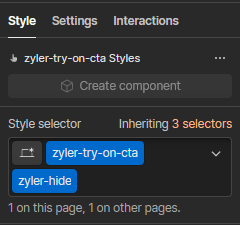
Create a Webflow Style selector called
zyler-hide. This is required to keep the button hidden until some behind-the-scenes checks have completed so that it can be made visible only if the outfit is ready for visualization.
-
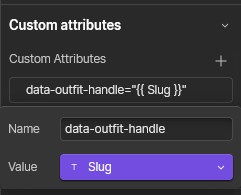
Create a Webflow "Custom attribute" called
data-outfit-handle="<outfit-handle>", where<outfit-handle>is replaced by your product id. This should be the Webflow "Slug" field which must correspond to the product id field on each outfit in the Partner Portal. The following shows an example of this Custom attribute:
This completes the integration steps. Zyler Go is now part of your Webflow site.